---
title: BlenderGIS 制作三维地形
date: 2023-03-01
tags:
- BlenderGIS
categories:
- GIS
---
### 1. 环境准备
- 下载安装好 `Blender`
- 下载安装 `Blender GIS` 插件,[插件地址]([domlysz/BlenderGIS: Blender addons to make the bridge between Blender and geographic data (github.com)](https://github.com/domlysz/BlenderGIS)) 。
安装:打开Blender,编辑=》偏好设置=》插件,点击安装,选择下载好的插件压缩包。

- 设置插件
插件安装好后可以配置空间参考、缓存路径、高程`EDM`数据源的Key。`EDM`这里选用的是[OpenTopography](https://www.opentopography.org/)

### 2. 模型制作
#### 获取范围
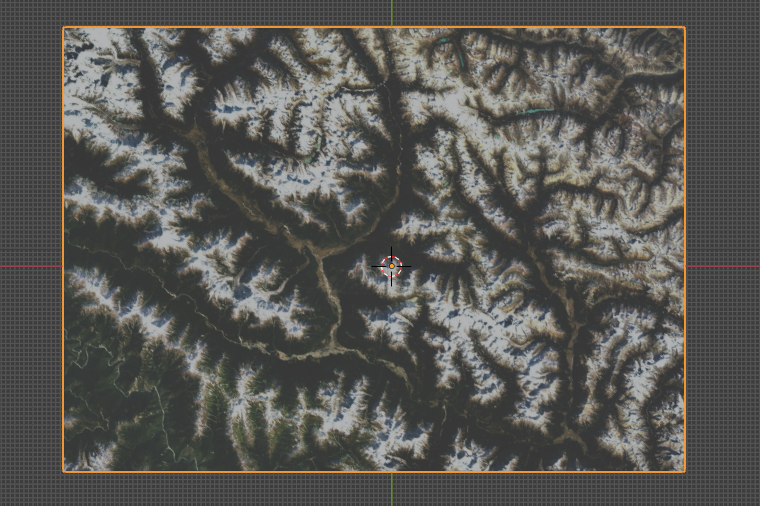
打开 `Blender` 将默认创建的实体删除掉,打开 `GIS` 插件,GIS=》Web geodata=》Basemap,选择 Google 源,Satellite 类型。
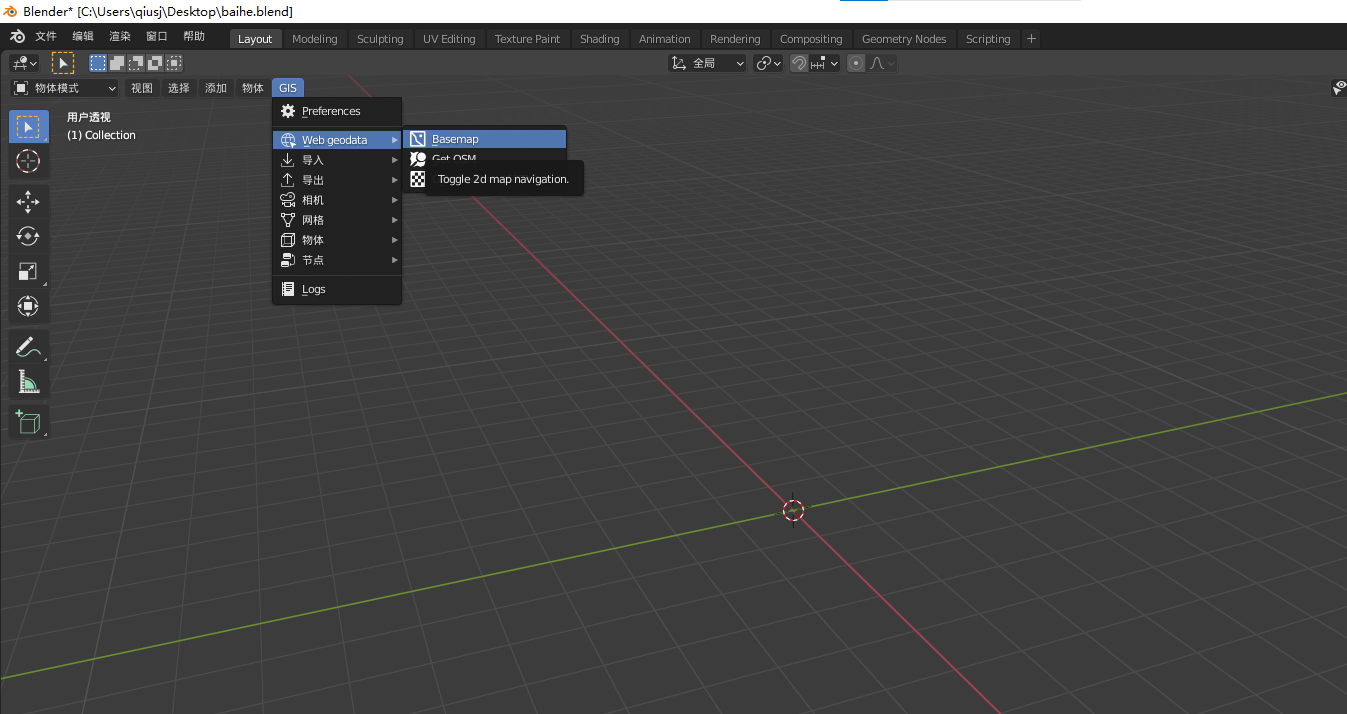
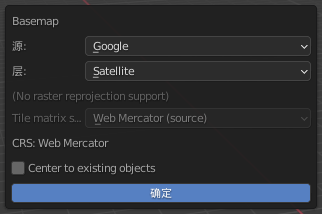
> 如果访问不了Google的源,可以选择其它的源,如:Esri
缩放移动,选择自己想要的范围,按 `E` 键就会截取当前窗口的范围。
#### 添加地形
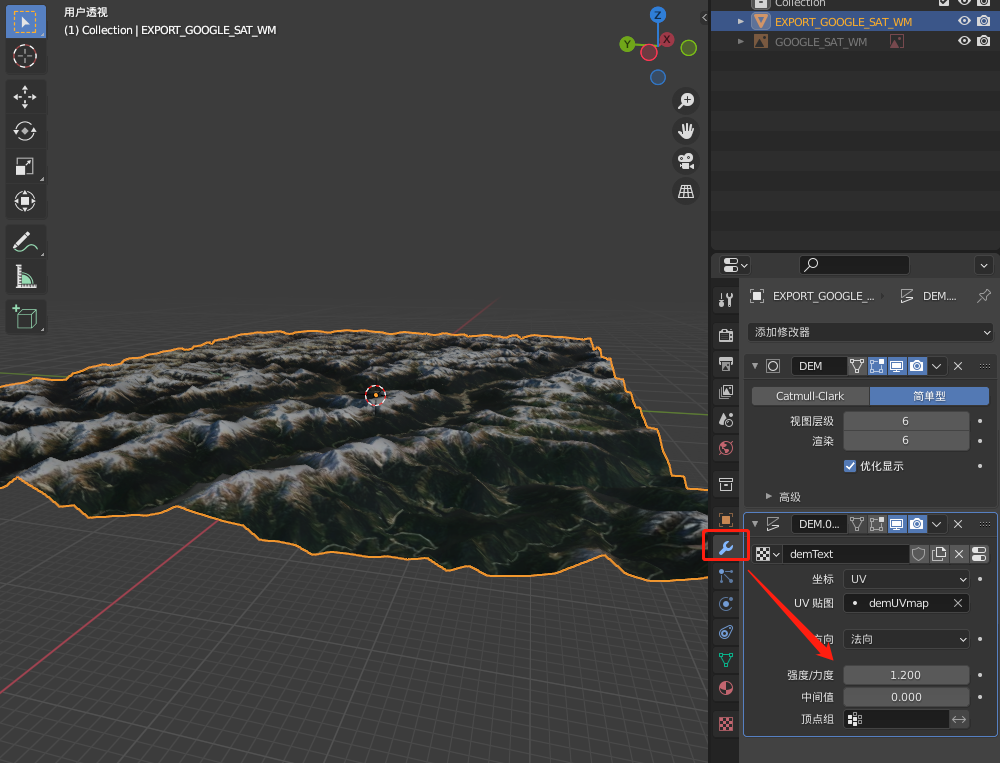
然后获取高程数据:GIS=》Web geodata=》Get elevation(SRTM)

等待数据下载完成后,就会看到之前截取的影像有了地形起伏的变化。

可以在修改属性器中修改地形的起伏比例,可以夸张程度。
#### 细分平滑
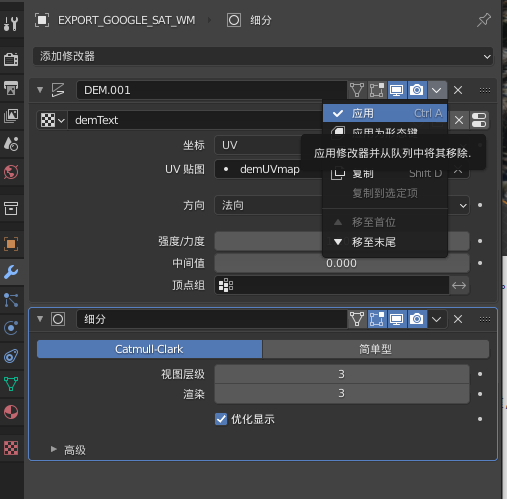
然后将实体细分:添加一个表面细分的属性
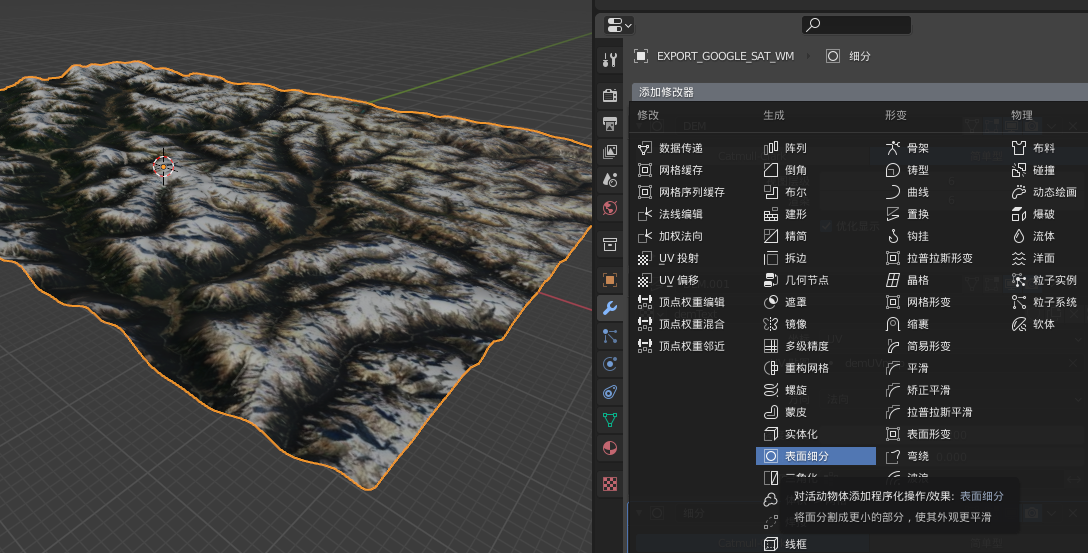
设置合适的值,让地形更加平滑。
将上述操作设置完成后,选择应用,保存设置效果。
#### 挤出底座
模型挤出操作:
在编辑模式下(`Tab`键),`A`键,然后`E`键,再`Z`键,鼠标往下移动,点击一下出现“挤出面板”,`S`键,`Z`键,再按`0`键,回车。

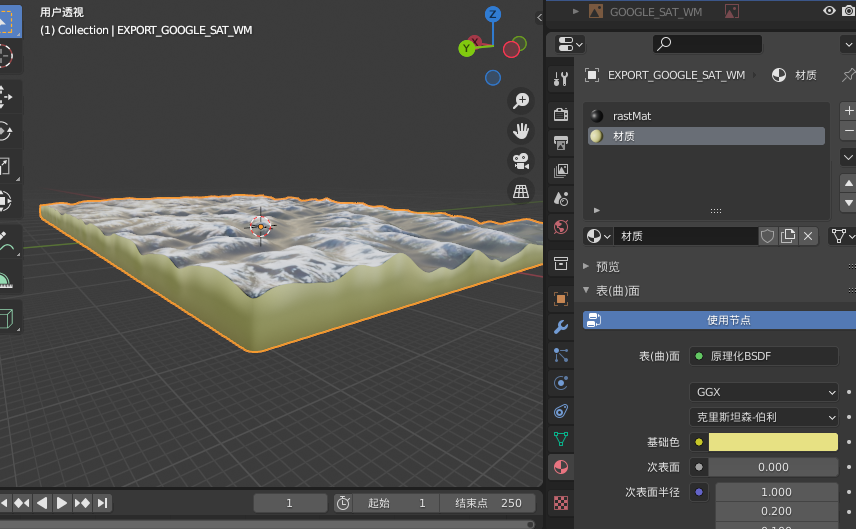
修改挤出的周边的颜色:
选择一圈面:
“编辑模式”切换到`面选择`,按“`Ctrl `+ `Alt` + 鼠标左键点击”,这样就可以选择并排循环的面。

新建纹理:
### 参考文章
[1] Blender+GoogleMaps+GIS插件 [https://zhuanlan.zhihu.com/p/421156296](https://zhuanlan.zhihu.com/p/421156296)